Adding Decorations
We assume you have created a map as shown in the "Your First Map" tutorial. Now we are going to extend this map with different Decoration types that are present in the library - Bubble-s and Marker-s. We will see how they can be used to create location pins, explanation labels, images and header
text.
Create a new DecorationLayer instance. The string parameter in the constructor provides the name for this layer. This name appears as a title for the layer in the layer controller of the map. We don't want the images to appear on the map by default so we set the visible property of the new layer to false. Finally we add it to the layers collection for the MapView:
JavaScript
 Copy Code Copy Code
|
|---|
// add a decoration layer for marker images |
| JavaScript
Copy Code
|
|---|
// create some markers with images |
Then add the new Marker to the decorations property of the markers layer.
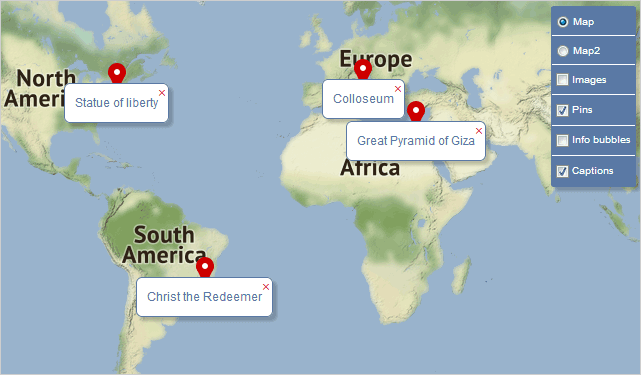
The pins are also instances of the Marker class. In order to create a pin we need to create just a new instance of the Marker class and set its location. We don't set an image or text. The pins will be on a new DecorationLayer and by default they are visible:
| JavaScript
Copy Code
|
|---|
// add a decoration layer for marker pins |
| JavaScript
Copy Code
|
|---|
// create some markers with default css styling |
The Bubble class provides labels with text that can be on multiple lines or a single line. In our sample we will use both types of info text. We first create a new DecorationLayer that will hold info Bubble-s with detailed text about each place of interest:
| JavaScript
Copy Code
|
|---|
// add a decoration layer for info bubbles |
The Bubble class again requires that the location be specified in the constructor. The text property accepts HTML formatting symbols. By default a Bubble renders text on multiple lines:
| JavaScript
Copy Code
|
|---|
// create some bubbles showing an HTML string |
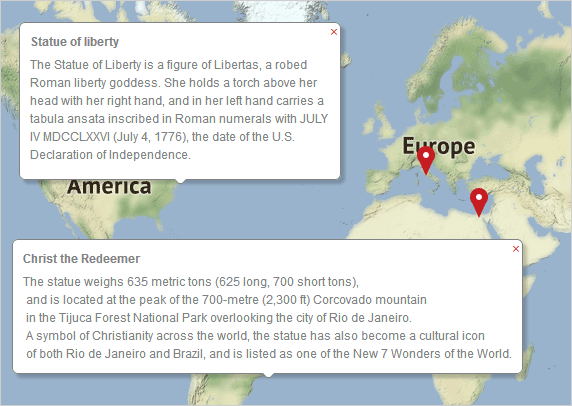
Multiline info Bubble-s are rendered at locations of interest. Users can close them by clicking on the 'x' button.
The captions are also Bubble instances. We set the multiline property to false because we want the name of the object to appear on a single line. We use the short text that appears as a tooltip in the markers layer to appear as a caption:
| JavaScript
Copy Code
|
|---|
// add a decoration layer for caption bubbles // create some bubbles showing a one-line text }, captions); |
| HTML
Copy Code
|
|---|
.mfm-bubble.caption:before, |
| JavaScript
Copy Code
|
|---|
caption.cssClass = "caption"; |
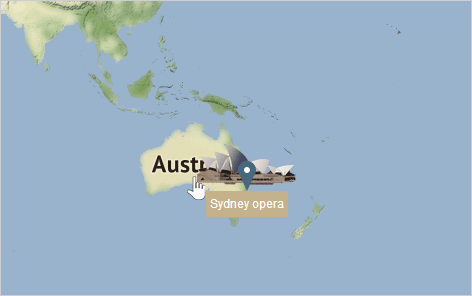
Let's shift the caption a little bit downwards because by default it will show over the image. We do this with the offset property, which requires a Point value:
| JavaScript
Copy Code
|
|---|
caption.offset = new d.Point(0, 30); |